
Campers will learn progressive hiking skills, such as hiking safety, maps, trails, and compasses. After the skill builder activities, campers will practice their skills on an outdoor hike.
Start at the beginning, and work until your grade level icon says, “CLICK HERE.”


Hiking Safety
Going for a hike is one of our favorite, easy ways to get outdoors! Before you hit the sidewalk, path, or trail, here are some basic safety rules to follow:
Basic Rules of the Road
1. Know before you go. This is the first and one of the most important rules for hikers. First and foremost, you must research your destination. Find out about the terrain, the weather, and the available facilities on the trail. Carry the 10 essentials recommended in this infographic.
2. Dress in layers. For example, a pair of shorts under your long pants. A tank top under your long sleeve shirt, a vest over your jacket. A beanie under your hat. Extra socks, gloves and undergarments. You can adjust your clothing as needed for hot or cold weather.
3. Have a pre-arranged plan of what to do in case someone gets separated from the group.
4. Make sure someone is aware of your hiking plans in case something happens. Check in with them at the beginning of your outing and again when you return. If you are not able to communicate due to an emergency, someone will be aware when you are missing.


Hiking Etiquette
When we are enjoying the outdoors it is VERY important to learn how to be the best guests possible! Here are a few important outdoor manners every Girl Scout should learn and remember when enjoying the outdoors:
Leave the area cleaner than you found it
Ask permission before you go on private property or enter another campsite
Obey signs that restrict an area
Walk on paths or walkways only
Respect nature and other people’s property
Make sure your fire is completely out before leaving the area
Walk in single file or by twos on traveled sidewalks and in single file towards traffic when walking on roads or in streets
Another element of hiking etiquette is following Leave No Trace principles. Check out this intro video:
Hiking Snacks
Many hikers get hungry on hikes, so packing a good snack is very important! You want a snack that is delicious and packs well. Here are a few snacks we love and recommend:


Simple Maps
Today we live in a world where our phone or watch can give us directions from one place to another. When we are camping or hiking, it is really important to be able to use a map to help us find our way. Often our phones or other electronic devices may not work where we are or we may not bring them with us. Use the video below to learn how to read a simple map:
practice
Look at our Sugar Hollow Day Camp map or, with the assistance of a parent, search online for a map of your favorite park or hiking trail. See if you can plot your way from one place to another. What markers do you need to look for? Are there any obstacles in your way?

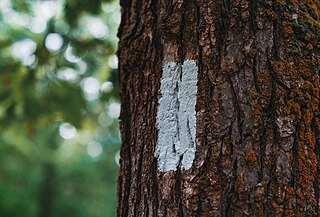
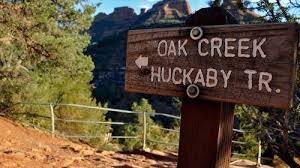
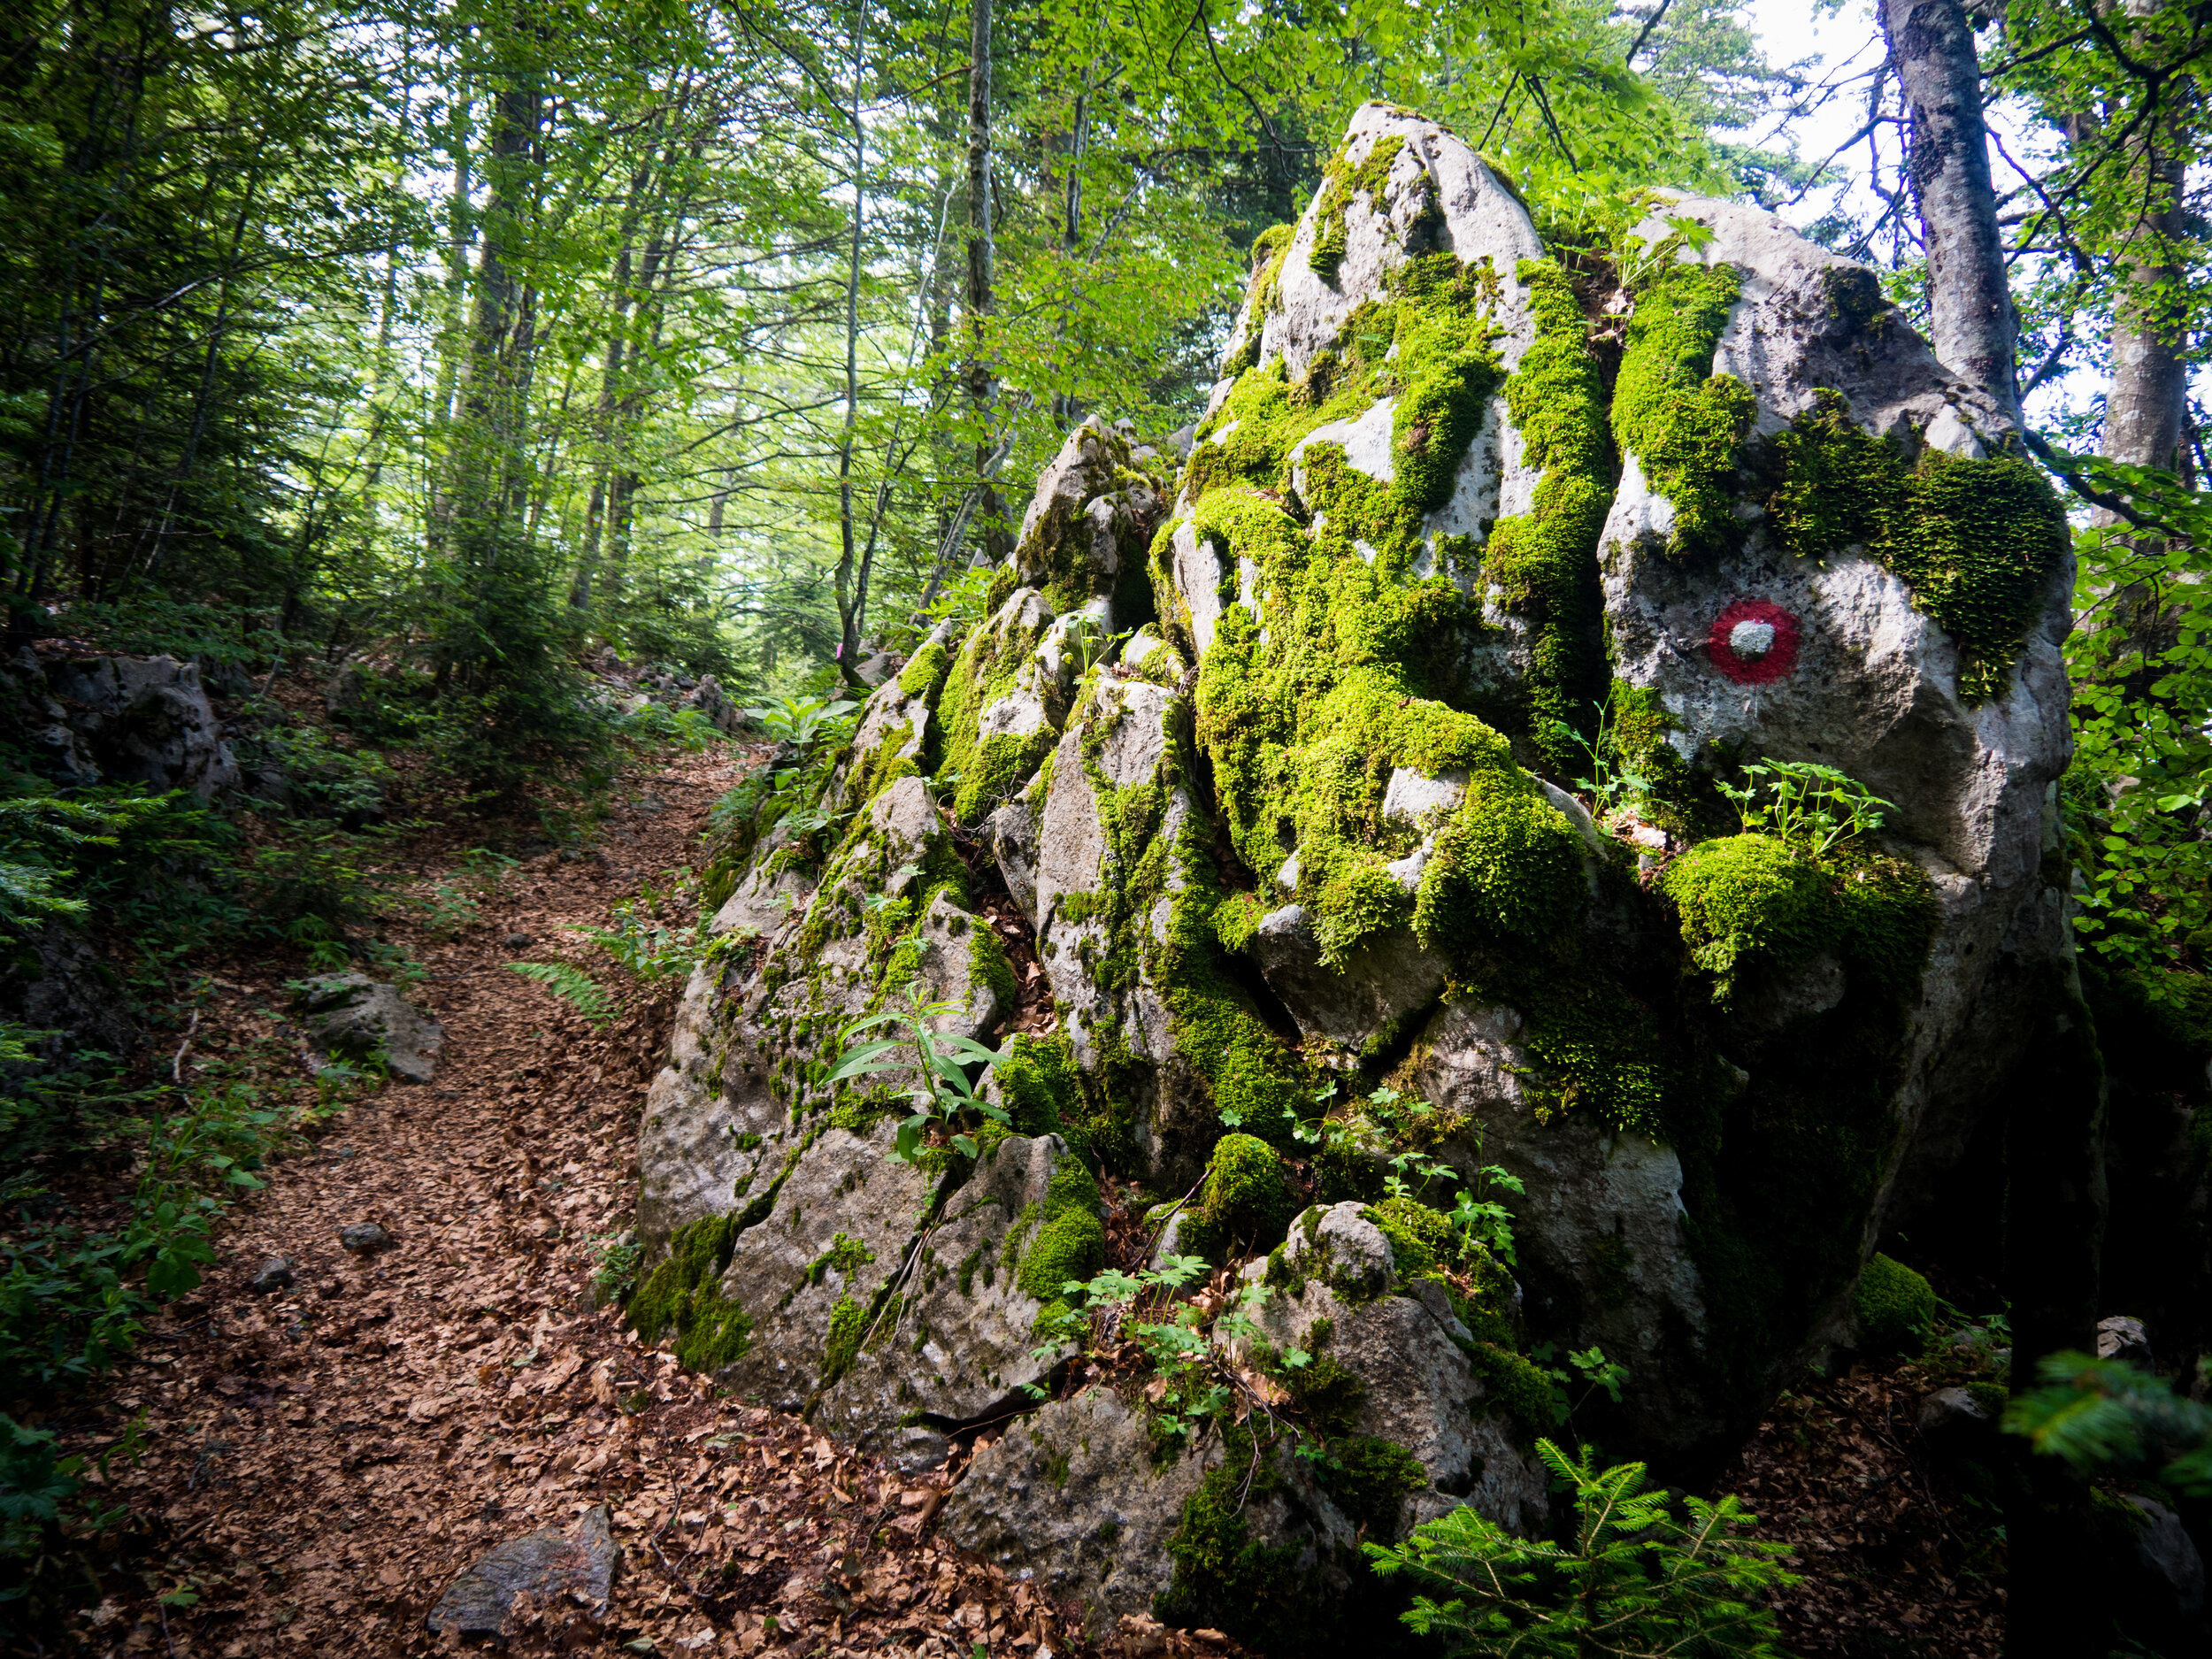
Trail Markers
Trails just don't spontaneously appear. They are planned, built and blazed so people can travel safely from trailhead to summit and beyond. The purpose of a trail marker (or blaze) is to help hikers follow a given path. It is used to indicate things such as the beginning and end of a trail, a change of direction or an intersection.
Blazes are found on prominent trees that are easy to spot on the trail. They are usually placed just above eye level - or slightly higher in areas that receive snow. Painted markers are roughly two inches wide and six inches tall, while other types of markers and signs may vary in size.
6 Common Types of Trail Blazes
1. Paint
Paint is most commonly used to mark a hiking trail. In the United States and Canada, the standard marking system uses rectangles in different configurations to guide hikers. We're explaining the meaning behind each configuration in the next section of this post.

2. Cairns (or ‘ducks’)
Cairns are piles of rocks that hikers leave alongside their path to mark a trail and guide other trekkers. They are usually found above treeline or in areas where trees are sparse.
Cairns vary in height, but they usually rise high enough to stand out from the surrounding landscape and be easily noticed.
Smaller stacks of stones (3 to 4) are called ducks. They also make great visual cues for hikers.
3. Posts
Posts with trail signs or markers are commonly used on ridge lines, rocky outcrops, and wherever else stones and trees are not available. Posts can also be very useful in areas where high snowfall are likely to obscure cairns.

4. Affixed Markers
As an alternative to paint markers, some trailblazers use markers made out of metal, plastic or wood that they nail onto trees.
Because paint can fade, affixed markers may sound like a more durable approach to trailblazing. However, it is not uncommon for these signs to fall off or get stolen, which is why paint markers still end up being the more reliable option.
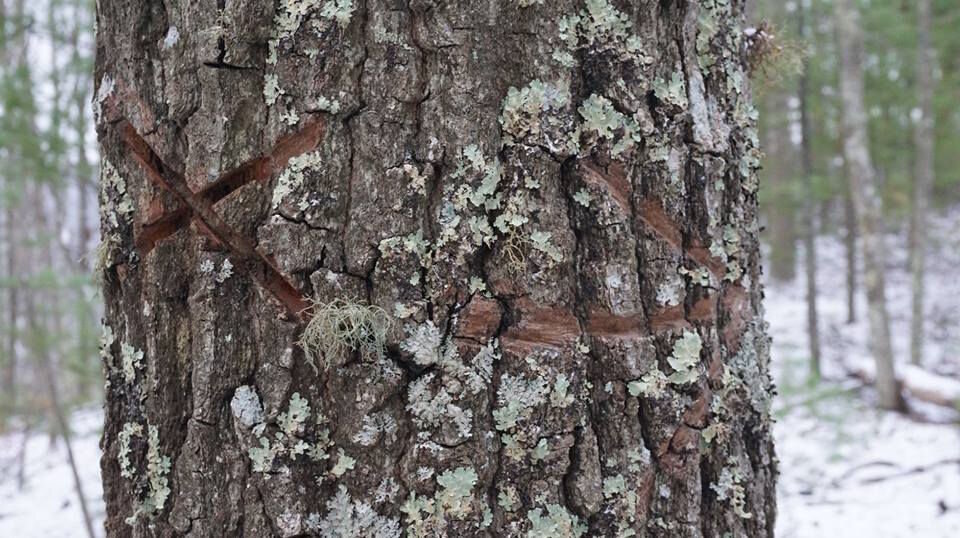
5. Etchings
An etching is a name given to a trail sign that is carved into a tree. Although effective, this type of blaze is employed much less frequently than other methods as it causes irreversible damage to the trunks.

6. Flags
Finally, some trails are blazed with flagging tape or ribbons in lieu of paint or affixed markers. Each flag is tied to a tree branch that can easily be spotted from the trail.
Paint Blazes: How to Read Them
Paint markers can be found in 6 different configurations. Each has a different meaning and is meant to indicate which way the trail is going.
Straight
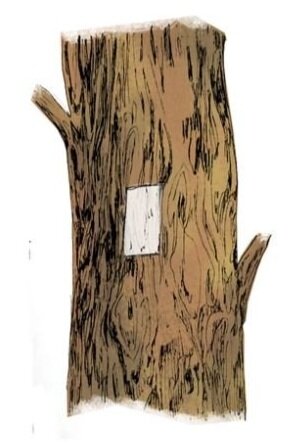
A single rectangle is a mere indication that you are on the right path. Keep going straight.
Right Turn

Two rectangles forming a right diagonal indicate a right turn. If you have a hard time remembering whether you're meant to go left or right, imagine a straight line going through both rectangles. The result would be an axis pointing in the direction of the turn - in this case, right.
Left Turn
Two rectangles forming a left diagonal signal a left turn.
Trail Start

Three rectangles forming an upward-pointing arrow show the beginning of a trail.
Trail End

Conversely, three rectangles structured in an inverted pyramid or downward-pointing arrow mean you've reached the end of the trail.
Intersection

Finally, a marker showing two triangles stacked next to one signal a spur leading to a different trail.
A Note on Color
In North America, trail blaze colors have no purpose other than to represent an individual trail. In other words, trails are typically marked in a single color from beginning to end. The Appalachian Trail, for example, uses white, while the Pinhoti uses yellow.
Blaze colors come in particularly handy when different trails intersect or when dealing with side trails. Because each trail is marked in a different color, it is easy knowing which markers to follow and which to ignore to stay on track.
This section was written and shared with permission by Kelly Hodgkins from Green Belly. To read the complete article, use this button:


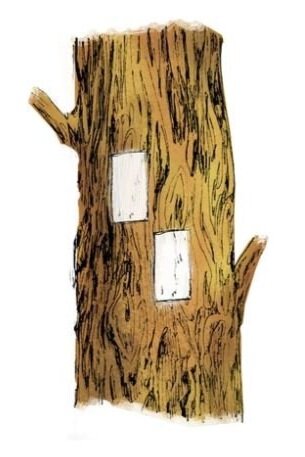
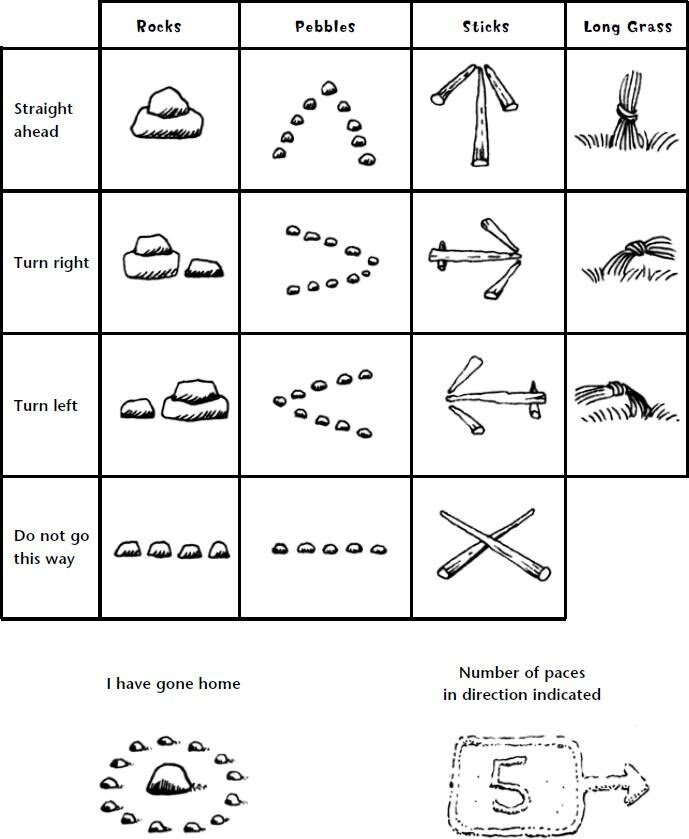
Trail Signs
Check out this video to learn how to make trail signs using sticks, stones and other natural objects.
practice
Lay a trail, using trail signs, for your family to follow throughout the house, in your backyard, in your neighborhood, or in a park. Make sure to remove the signs when you are done.


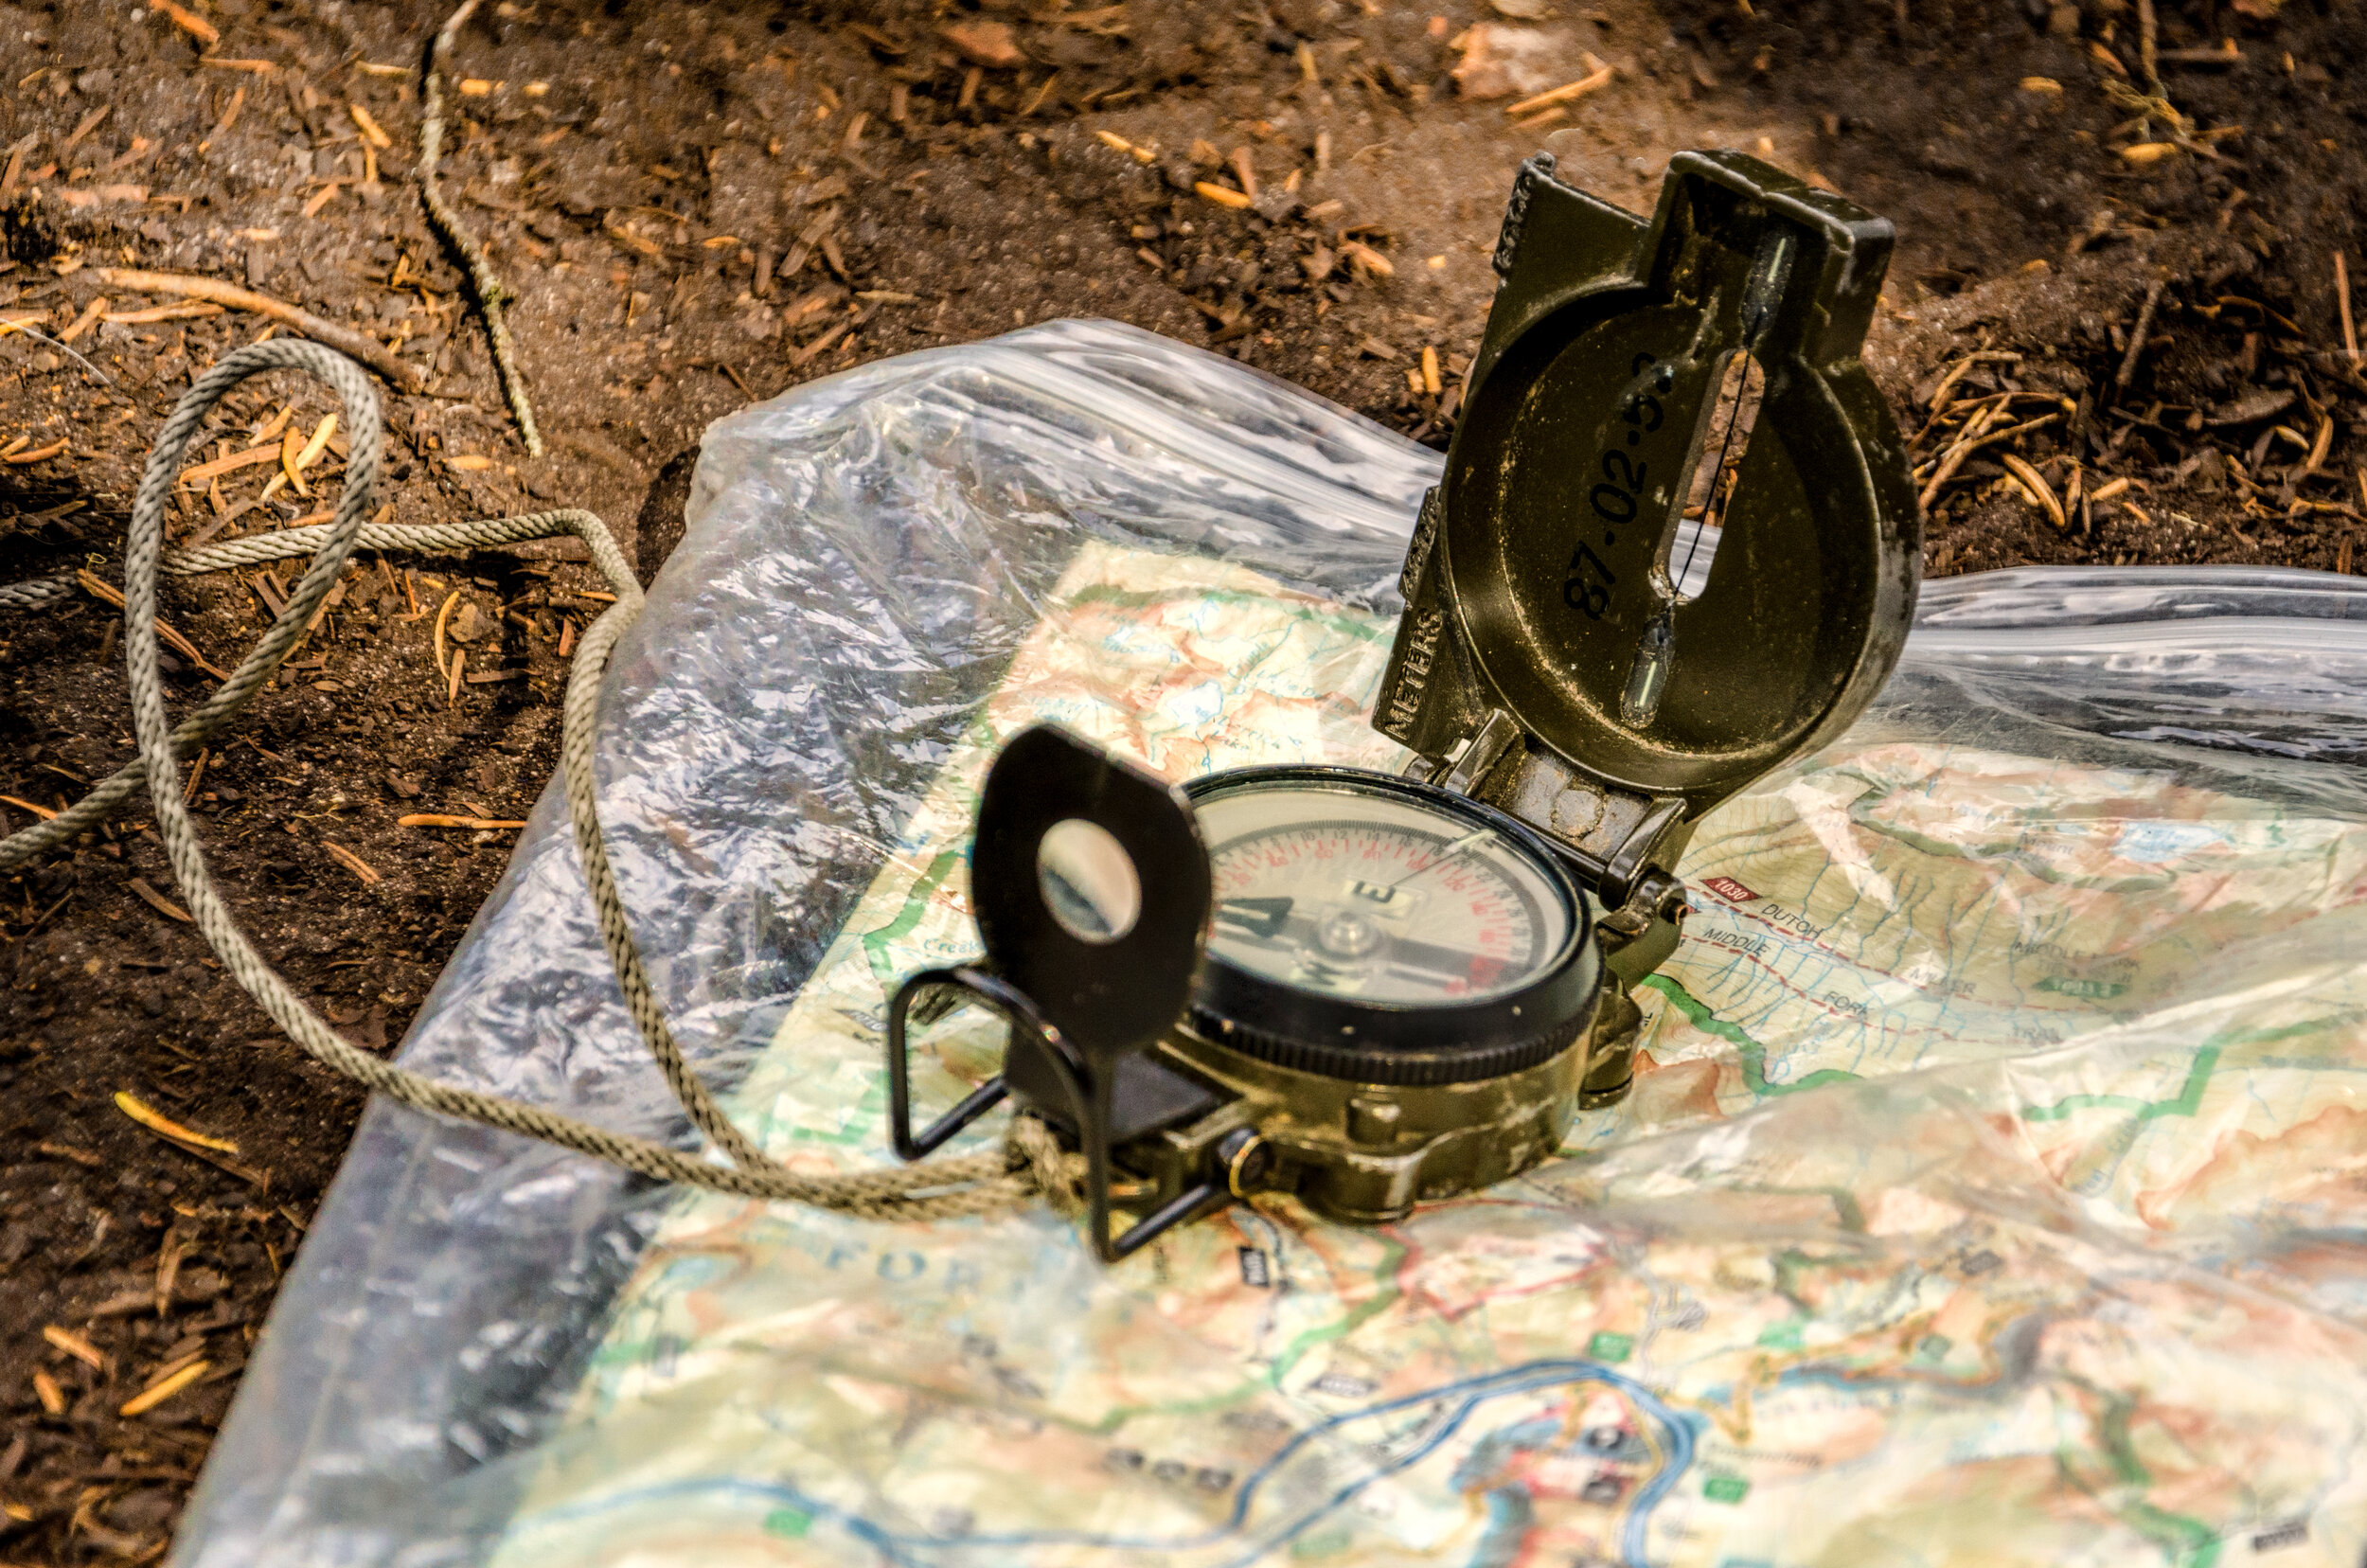
Compasses
If you have a good map and a compass, you can find any place in the world! This makes a compass an invaluable tool when hiking and camping in the woods. Here is how a compass works and what it does:
practice
Do you have a compass?
option 1: no compass
Stand up.
Where does the sun come up? Point to that spot with your right hand. Keep your hand there.
Where does the sun go down? Point to that spot with your left hand. Keep your hand there.
You are now looking north! East is toward your right hand, south is to your back, and west is toward your left hand.
As a practice game, create a treasure map using directions and landmarks. For example,
Start at the mailbox.
Turn south, and walk 10 paces.
Turn east, and walk 35 paces.
Turn north, and walk 15 paces.
Where are you? (the playground, stop sign, friend’s house, etc.)
Use your map with a family member or friend, and help them with their navigation skills to find the treasure!

option 2: compass
Create your own Compass Treasure Hunt using the directions below. Invite family members or friends to participate with you.
How It Works
Players assemble at the starting point. One player is given a note with a compass course and a distance, measured in steps. This clue leads to the first waypoint, where two items are to be found: a small bag of treats to keep everyone happy and motivated, and a second note with a new compass bearing leading to the next waypoint. Each waypoint has a small offering of treats and a new note. Each note has the name of one of the players, so everyone gets a chance to use the compass. At the end is a final “treasure” for everyone to discover.
Set the Course
The course can be located anywhere: the park, beach, or backyard. It can be as simple or complex as you want, but should be scaled in difficulty to the ages of the players.
1. Standing at the starting point, look around in the distance for a hiding place for the first little treasure and next clue: behind a tree, hanging from a branch, behind the garage … Hold the compass and check to see that it’s level enough for the needle or card to spin freely. Wait till it points steadily in one direction, and turn the compass so “N” lines up with the pointer. Now hold the compass in front of your face, and turn it until the needle points to North. Look to the hiding spot, then look down to the compass and read the “degrees” which point to the spot. (This method is simple, but not “pinpoint” accurate. Keep the next clue reasonably easy to locate).
2. Walk to the first hiding spot and count your steps along the way. Be sure to take the same size steps as the players would. Write down the number of steps and the course (in degrees) on a small piece of paper. This is the clue you’ll give the players at the start. Repeat the process for the next clue: look for a hiding spot, take a compass bearing, count the steps, and write it down. Once you’ve finished plotting this second clue, you have to backtrack to the first clue location and leave the note with compass bearing and # of steps to the spot you just plotted. Don’t forget to leave a few treats to keep the players enticed.
3. Create as many waypoints as you like, but make enough so that each player gets a turn. The final “treasure” can be buried, hidden, or covered, but where all can access it together. (Not up a tree!) It can even lead right into your house where the birthday cake is waiting as the treasure.

Navigation
Most people who get lost in the woods didn’t plan on it! They are generally campers who got separated from their group or take the wrong trail. All things most people wouldn’t bring a compass for! It is really important to get your bearings in these situations. Here are a couple of ways to help navigate through these scary situations.
If you need to follow north (or any direction) for an extended period of time, it is helpful to find a landmark to walk towards. This way if obstacles cause you to stray from the straight path you are able to line back up again. It may be helpful to find closer, more frequent landmarks to walk towards, versus one landmark a long distance away. Here are a few ways of finding north:

Use the Sun
1. The sun rises in the east and sets in the west generally.
2. But during most of the day the sun appears to be just generally overhead and it can take a while to watch the sun’s movements to determine the direction it is headed.
3. So instead there is a method to help us track the movements.
Use a Stick
1. Put a tall stick in the ground and mark the top of its shadow with a rock or an X in the dirt.
2. Wait 15 minutes and place a second rock/X at the tip of the shadow’s new location.
3. Place your left foot on the first rock’s location and your right foot at the second rock’s location. You are now facing North!
4. You can also draw a W at the first spot and an E at the second spot. Then draw a perpendicular line for North and South.
5. Pull your compass out. How accurate to North were you able to get?
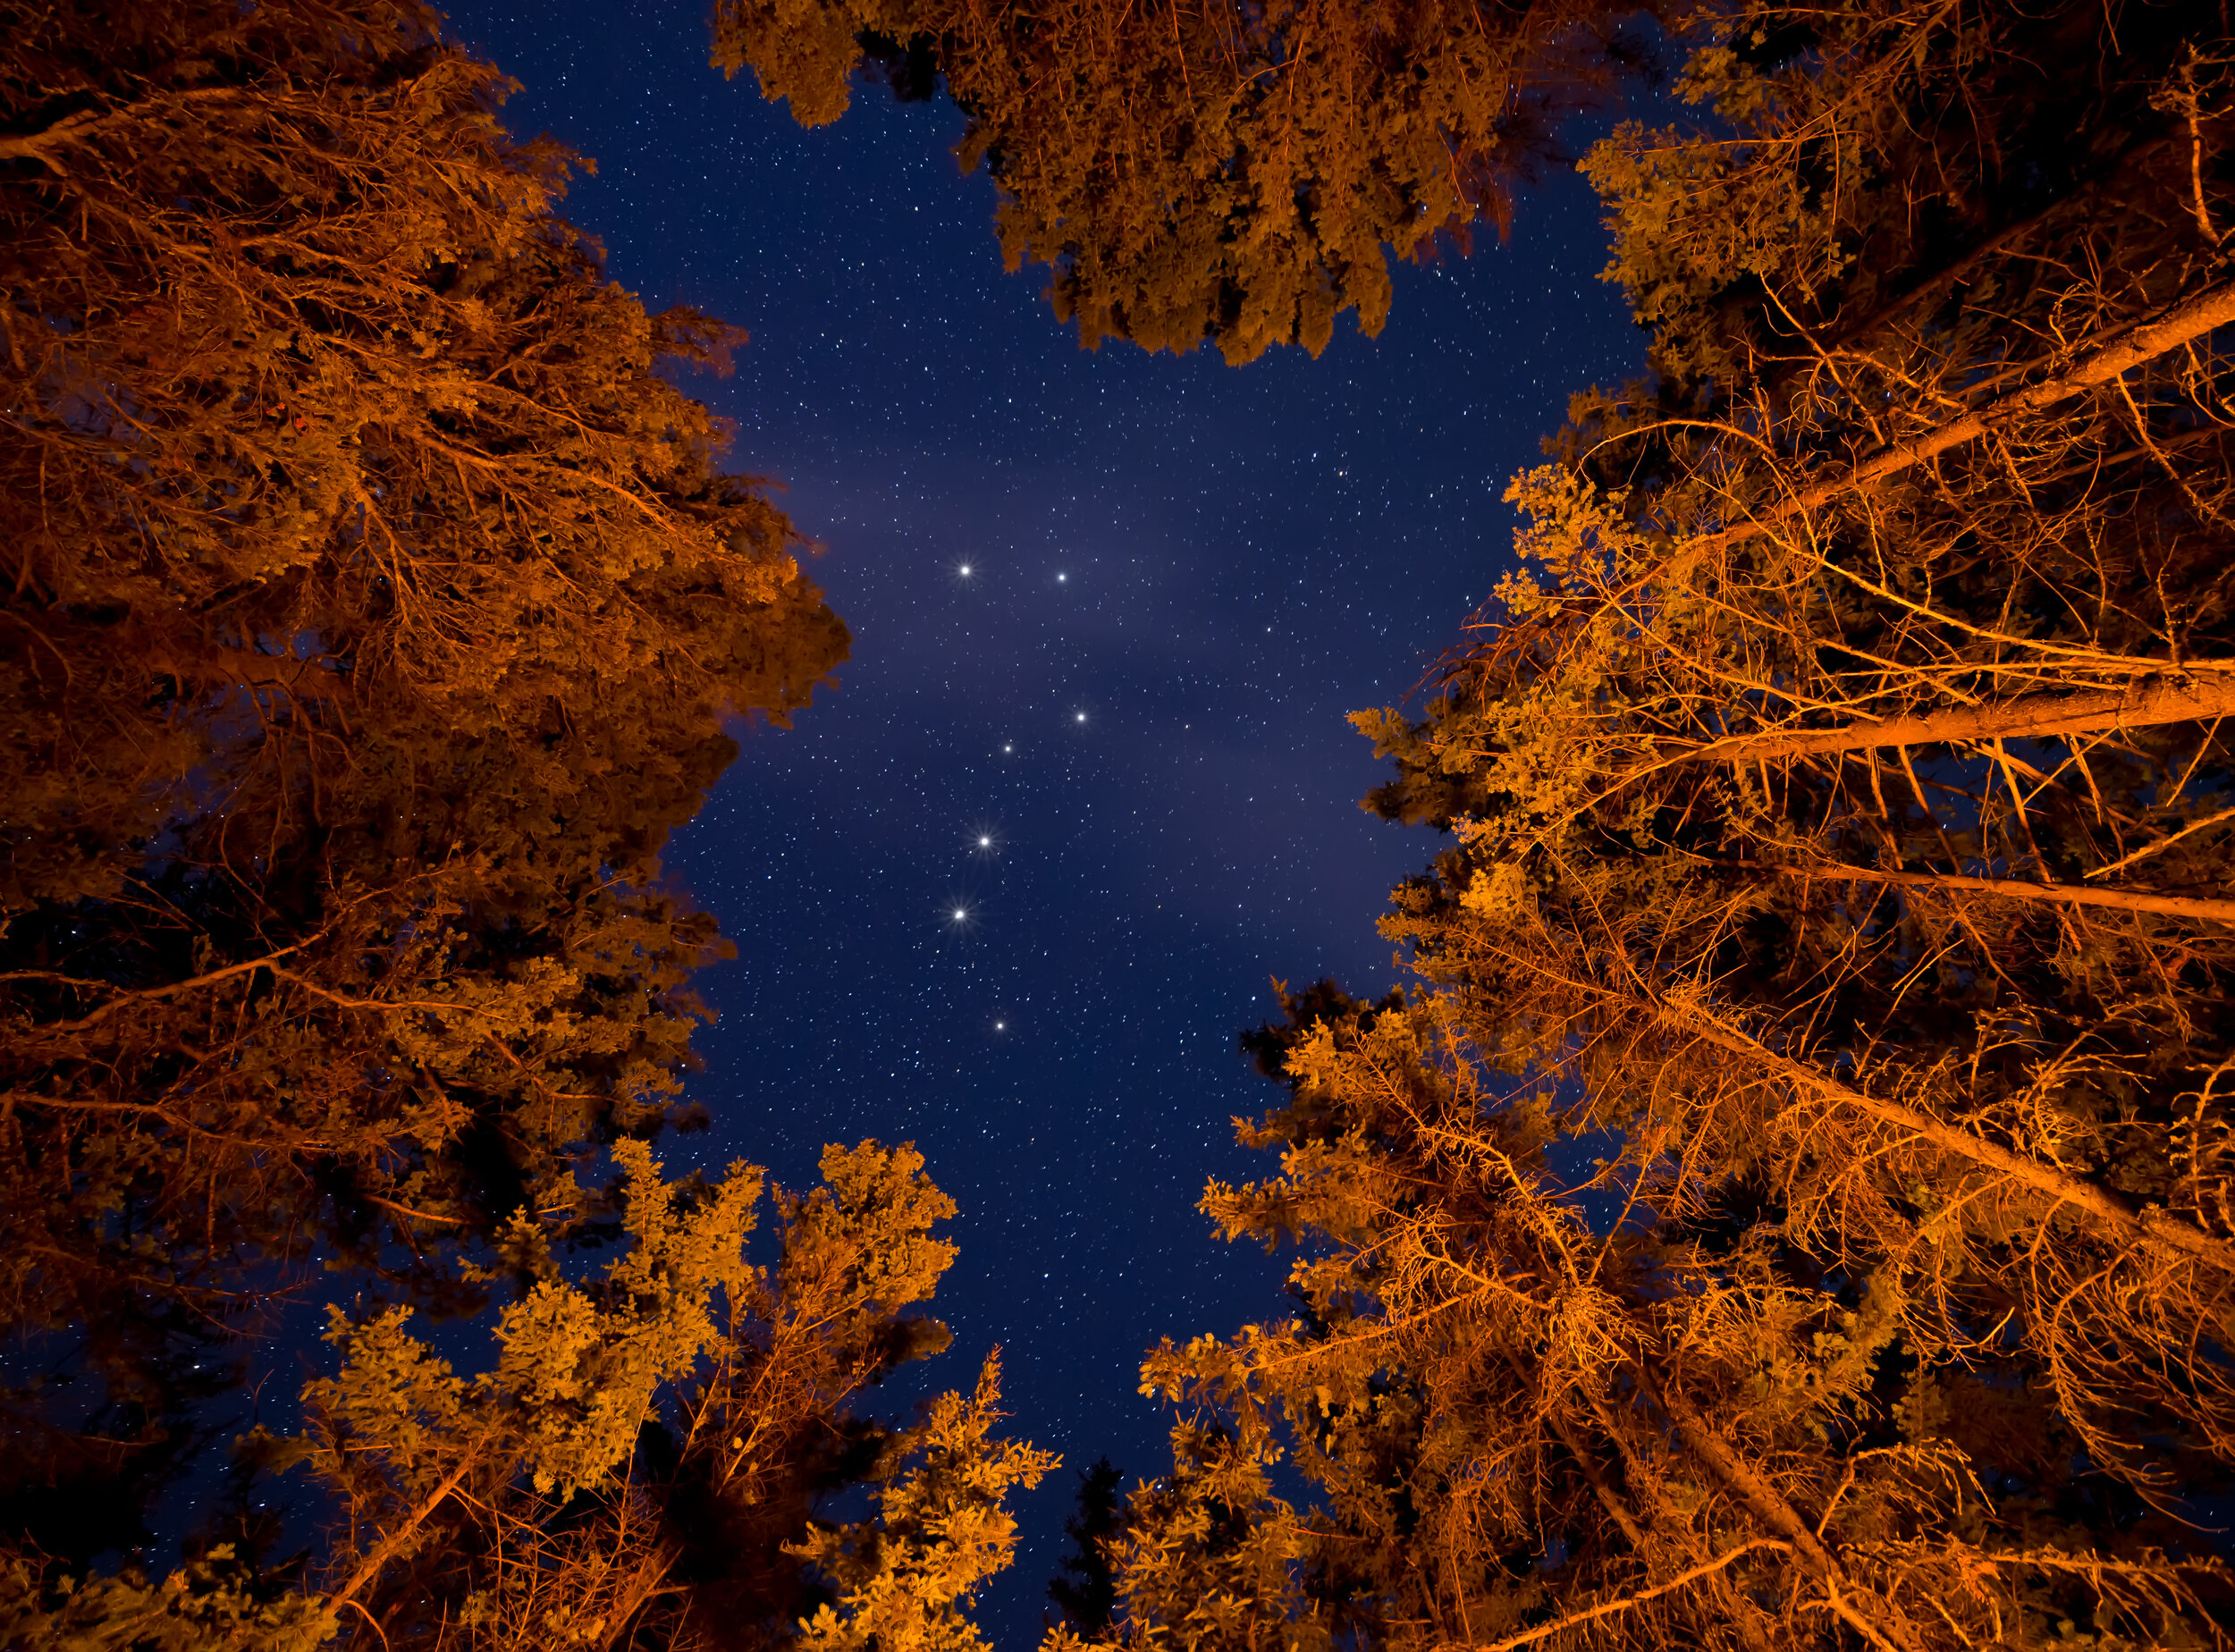
Use the Stars
Now we are going to learn how to find North while in the Northern Hemisphere. If you ever go to the Southern Hemisphere you’ll see different constellations and will use those to find south instead, but today we’ll just focus on the Northern Hemisphere.
1. In order to find North, we need to find the star Polaris or the North Star. The easiest way to do this is by first finding the big dipper
2. Once you have found the big dipper, you will take the two stars on the cup of the ladle, opposite the handle, and draw a mental line extending outward.
3. This line will intersect with Polaris. Then follow an imaginary line from Polaris, perpendicular to the horizon, and to the ground. This direction will be North.
4. While facing North, you can now determine that East is directly to your right, South is directly behind you, and West is directly to your left.
Fun Fact! Polaris is also the first star in the handle of the little dipper. See if you can find the little dipper after you have found Polaris.
Use the Plants
1. In general, moss will grow on the North side of trees.
2. And when looking at a mountain or valley, there will be more vegetation on the North facing side then on the south.
Note: This is very general and many factors influence moss and vegetation growth. This method should be used for fun or with one of the earlier listed methods to maintain your path and should not be relied on solely.
In addition to finding north to orient your path, you may find it helpful to estimate what time it is. Here is a way of telling time using the sun when you don’t have a watch:

Topographical Maps
Learning to read that paper topo map (short for topographic map) is every bit as essential. Your map will then be able to tell you a richly detailed tale about the terrain you’ll be exploring.
How Contour Lines Describe Terrain
Simple trail maps are useful for trip planning but NOT for navigation in the field. Topographic maps go further, giving you the power to visualize three-dimensional terrain from a flat piece of paper. The feature that makes this possible is contour lines:
Contour lines indicate the steepness of terrain. Contour lines connect points that share the same elevation: Where they’re close together (they never intersect), elevation is changing rapidly in short distance and the terrain is steep. Where contour lines are wide apart, elevation is changing slowly, indicating a gentle slope.
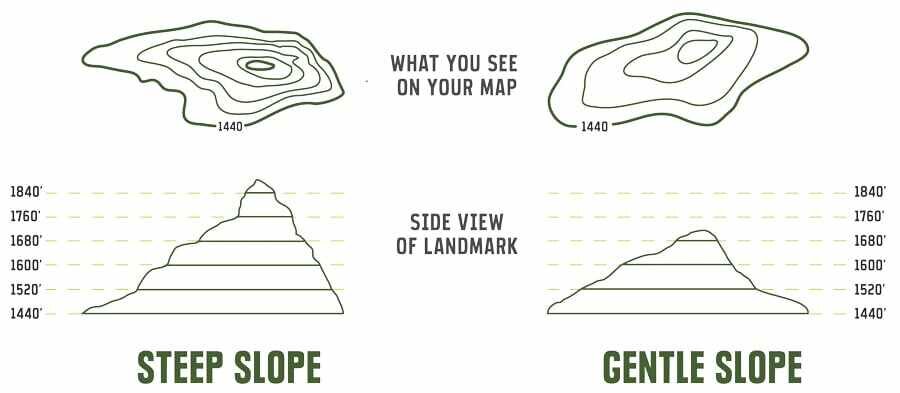
Contour lines also indicate the shape of the terrain. Roughly concentric circles are probably showing you a peak, and areas between peaks are passes. Studying a topo map of a familiar area is a great way to learn how to match terrain features with the contour lines on a map.

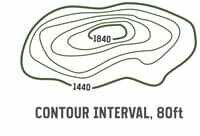
Index contour lines: Every fifth contour line is a thicker, “index” line. At some point along that line, its exact elevation is listed.
Contour interval: The change in elevation from one contour line to the next is always the same within the same map. Many maps have either a 40- or 80-foot contour interval: An 80-foot interval simply means that each contour line is 80 vertical feet away from the next closest line. You find the contour interval for your map in its legend.

Every once in a while, a circle indicates a depression rather than a peak. A circle with tick marks inside it indicates a depression, rather than a peak. You should also see elevations decreasing as you get near the depression.
Map Scales
The map’s scale tells you how detailed your map is. A 1:24000 scale, for example, means one inch equals 24,000 inches in reality. A larger scale, like 1:65,000, means that a map covers a larger area, but that it will have less detail.
Maps also have a representative scale to help you visualize real-world distances. You can use this scale and a string or the edge of your compass to get a rough estimate about hiking distances on your map.

This section was written and shared with permission by Lindsay McIntosh-Tolle and REI. To read the complete article, use this button:

Nature Sound Hike
With an adult, take a walk short hike through your neighborhood, in a public park, or on another trail. Plan your route ahead of time, and dress appropriately for the weather.
On your hike, listen for and identify five natural sounds.
Don’t forget to take everything you need on your hike:
Map Hike
With an adult, take a short hike about one mile long through your neighborhood, in a public park, or on another trail. Plan your route ahead of time and dress appropriately for the weather.
On your hike, take a snack and use a map.
Don’t forget to take everything you need on your hike:
Service Project Hike
With an adult, take a short hike about two miles long through your neighborhood, in a public park, or on another trail. Plan your route ahead of time, dress appropriately for the weather, take a snack, and use a map.
On your hike, complete a service project, like doing something nice for a neighbor, fixing something in the neighborhood, improving the trail, or cleaning up the area.
Don’t forget to take everything you need on your hike:

Long Hike
You have been practicing your hiking skills and learning new methods of navigation to assist you on your journey. Pack a lunch or snack and plan a hike that is at least 2 miles. During the hike, be of service by picking up trash/litter along the way and pack it back home with you to dispose of it. Bring along a nature activity to try: On your hike, use one of the skills you’ve learned this week, like knots, tools, or navigation. Remember - this is your chance to use your skills! Tell someone where you are hiking, bring a map, hike with a buddy, bring your phone and practice your Leave No Trace skills the whole way.
Don’t forget to take everything you need on your hike:
Navigation Hike
Through our progression activities, you have learned various ways to navigate - including using your compass, using trail signs, using a map/topographic map, and using the sun and landmarks. Pick one of these navigation methods and practice using the skill with a buddy. Make sure that you tell an adult where you are going, bring a map, and bring your phone. Remember - even though you are practicing navigation skills as if you were lost, you don’t actually want to get lost. Practicing these skills makes it very easy to use them when you need them!
Don’t forget to take everything you need on your hike:

Celebrate! Send us a picture or video of you completing a hiking activity.
Let us know what you loved about the hiking activities and what we can improve.
Return to the main Virtual Camp page to complete the next skill station, Ceremonies.